Origami: Simple Mushroom Instructions
This little 2D mushroom is so cute and easy to make, and the best part, is that you can add your own designs, colors, patterns, anyway you like! All you need is an origami paper of you choice in color, some color pencils or markers or paint, and whatever else you might like to decorate your mushroom with!


Instructions for the origami mushroom:
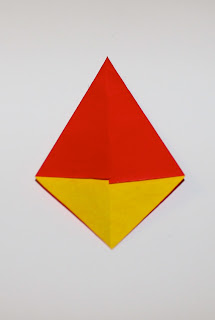
Create a Kite Base. The color you want your mushroom head to be will be on the outside(my red), and the color for the stem will be on the inside of the base.

In this next photo, I drew two lines to show you where I am going to cut. You do not need to do this, just know that these cuts are a third of the way in. So in other words, measure or estimate the kite base in thirds, and use that to cut.


Once cut, turn the origami over and take the corners of the cuts and fold it slightly downwards until it hits the center of the paper. If you want the stem of the mushroom to be thinner, then you can fold the corners pass the center fold.

Then, bring the bottom corner upward. The higher you fold, the shorter the mushroom stem.

Then, fold the top point downwards. The lower you position the point, the shorted the head of the mushroom.

To add that round shape of the mushroom, just take the top corners and fold it.

Adjust the bottom tip, turn it around and you have your cute mushroom.

To add more character to my mushroom, I just colored in white circles, but you can add whatever you want to your mushroom!

I hope you enjoyed this little tutorial!
Happy Wandering Creatively! Alice
Other origami Instructions:


Comments
Post a Comment